To add a logo to a ZPL label, you convert your image to a 1-bit monochrome bitmap, encode the pixel data as ASCII hex or Z64 compressed binary, and embed it using the ^GF (Graphic Field) command inside a standard ^XA/^XZ label block. Label Toolkit can export print-ready ZPL with your logo already encoded, saving the manual conversion entirely.
ZPL's ^GF command renders an inline graphic using hex-encoded or compressed binary pixel data, with no separate print driver needed.
For logos you reuse across many labels, download the image to printer memory with ~DY or ~DG, then recall it with ^XG to save bandwidth and print time.
Images must be 1-bit monochrome (black or white per dot); grayscale and color require dithering before encoding.
Label Toolkit's browser-based designer handles encoding and placement automatically and exports valid ZPL you can send directly to any Zebra printer.
What is the ^GF command in ZPL?
^GF stands for Graphic Field. It tells the printer to render a block of binary image data directly on the label at the current field origin. The command was introduced in ZPL II and is documented in Zebra's ZPL II Programming Guide. Unlike a Windows print driver that rasterizes a PDF, ^GF lets you embed image data directly in the ZPL stream, which works over raw TCP/IP, USB, serial, or Bluetooth.
The full syntax is:
^GFa,b,c,d,data
Parameter
What it controls
Common values
a (format)
Encoding type: A = ASCII hex, B = binary, C = Z64 compressed
A for readability, C for large images
b (data bytes)
Total number of bytes in the data field
Calculated from row bytes x height
c (total bytes)
Total bytes per row, rounded up to the nearest byte
ceil(width in dots / 8)
d (row bytes)
Bytes per row actually used (can equal c)
Same as c for non-compressed images
data
The actual pixel data as hex pairs or binary
e.g. FF00FF...
How does ZPL represent image pixels?
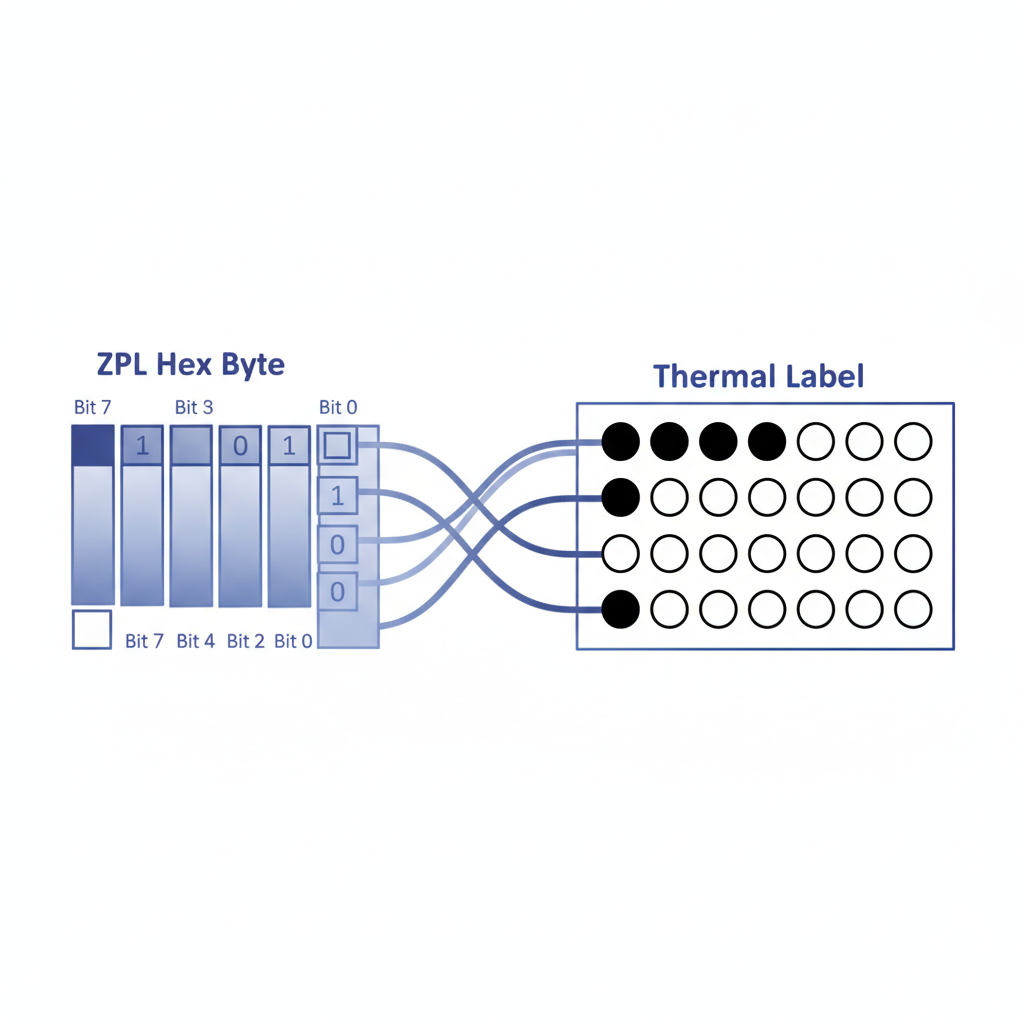
Each byte in the hex data represents 8 horizontal dots. A 1 bit prints a black dot; a 0 bit leaves the dot white (unprinted). So the hex byte FF (binary 11111111) prints 8 solid black dots in a row, while 00 prints 8 white dots, and F0 prints 4 black then 4 white.
For a logo that is 48 dots wide, each row of pixel data is 6 bytes (48 / 8 = 6), represented as 12 hex characters. A 48x16 dot logo produces 6 x 16 = 96 bytes, or 192 hex characters total.
Step-by-step: how to add a logo to a ZPL label
Prepare your image. Start with a high-contrast PNG or BMP. For a 203 DPI printer, a logo 1 inch wide needs at least 203 pixels across; at 300 DPI, aim for 300 pixels. Crop tightly, remove color (convert to pure black on white), and resize to the exact dot dimensions you want printed.
Convert to 1-bit monochrome. Use any image editor such as GIMP or the free IrfanView to save as a 1-bit BMP or to dither grayscale logos. Dithering (Floyd-Steinberg is common) converts gradients into dot patterns that thermal printers can reproduce.
Generate the hex data. Read the BMP pixel rows (skipping the BMP file header, typically 62 bytes for a 1-bit BMP) and convert each byte to its two-character uppercase hex equivalent. Row order in BMP is bottom-to-top, so reverse the rows before encoding for ZPL, which reads top-to-bottom.
Calculate parameters. For a 96-dot wide, 64-dot tall logo: bytes per row = ceil(96/8) = 12; total bytes = 12 x 64 = 768; hex characters = 1536.
Position with ^FO and embed with ^GF. Use ^FO (Field Origin) to set the top-left corner of the image in dots from the label's home position. For example, ^FO20,10 places the image 20 dots from the left edge and 10 dots from the top.
Close the field.^GF does not require a separate ^FS (Field Separator) to close it, but including ^FS after the data is harmless and keeps your ZPL consistent.
Test on a real printer or simulator. Send the ZPL to your printer over raw port 9100, or preview it in Label Toolkit before wasting media.
A minimal working ^GF example
The snippet below prints a tiny 16x8 dot solid black rectangle (all FF bytes) to illustrate the structure. In practice, your logo data replaces the repeated FF pairs:
FFFFFFFFFFFFFFFFFFFFFFFFFFFFFFFF: 32 hex chars = 16 bytes = 8 rows x 2 bytes each = 16x8 dots, all black.
For a real company logo at 203 DPI occupying a 1 x 0.5 inch area, the pixel block is 203 x 101 dots. Bytes per row = ceil(203/8) = 26. Total bytes = 26 x 101 = 2626. Your hex data string will be 5252 characters long. That is normal and correct.
Storing logos in printer memory with ~DY and ^XG
Embedding the full hex blob in every label is fine for one-off prints, but it adds kilobytes to every job when you print thousands of labels per shift. The better pattern is to download the image once and recall it by name.
~DY (Download Objects) lets you store a graphic in printer memory (DRAM, Flash, or a memory card, depending on the printer model). The syntax is:
~DYR:LOGO,B,P,total_bytes,0,data
R:LOGO: store the file as LOGO in RAM (E: for Flash, B: for card).
B: binary format (or A for hex, C for Z64).
P: file type is PNG (Zebra Link-OS printers accept PNG natively via ~DY; older firmware may require GRF format).
Once downloaded, reference it in any later label with ^XG:
^XA
^FO20,15
^XGR:LOGO.GRF,1,1
^XZ
^XG accepts a scale factor for X and Y (the two 1,1 arguments above mean 1:1 scaling). Scaling to 2,2 doubles the dots, but expect quality loss since ZPL scaling is nearest-neighbor, not bicubic.
The older ~DG (Download Graphic) command works similarly but only accepts ASCII hex GRF data, not PNG, and stores directly to RAM. It remains widely supported on legacy firmware:
~DGR:LOGO.GRF,total_bytes,bytes_per_row,hex_data
Then recall with ^XGR:LOGO.GRF,1,1 exactly as with ~DY output.
Z64 compression: when should you use it?
Z64 is a base64-encoded, LZ77-compressed encoding for ZPL graphic data. Using format type C in ^GF or ~DY instead of A (ASCII hex) can shrink a large logo's data by 50 to 70 percent, which matters if you are sending labels over a slow serial connection (9600 baud is still common on legacy hardware) or over a low-bandwidth wireless network in a warehouse. The tradeoff is that Z64 is harder to generate by hand; use a tool or Label Toolkit's ZPL export to produce it automatically.
How to handle logos in Label Toolkit without writing ZPL by hand
If writing hex data strings by hand sounds tedious, that is because it is. Label Toolkit's browser-based designer automates the entire pipeline. You upload your logo PNG or SVG, position it on the canvas, and when you export to ZPL the tool converts the image to 1-bit monochrome at the correct DPI, generates the hex encoding, and writes the ^GF block with the right byte counts. You get copy-paste ZPL ready to send to your Zebra printer.
This almost always means the image was not properly converted to 1-bit before encoding. Grayscale bytes outside the 0x00/0xFF range are interpreted as solid black at the bit level once thresholded incorrectly. Re-export the image with a proper threshold (pixels above 127 luminance become white, below become black) and regenerate the hex data.
The logo appears inverted (white logo on black background)
In ZPL, a 1 bit prints a black dot and 0 is white, matching the standard BMP bit convention. If your printer is in inverse mode (set by ^LN, Label Reverse), all bits are flipped. Check for a stray ^LN in your label format, or invert your image before encoding.
The logo is the right size but positioned wrong
Verify that the ^FO coordinates preceding ^GF are in the correct unit for your printer's DPI. At 203 DPI, 1 mm equals approximately 8 dots. At 300 DPI, 1 mm equals approximately 12 dots. A coordinate that looks right at 203 DPI will be roughly 50 percent too small in physical distance at 300 DPI. Use Label Toolkit's unit-aware canvas to avoid this arithmetic entirely.
The ZPL stream is huge and the printer times out
Switch to Z64 compression (^GFC instead of ^GFA), or download the logo to printer memory once with ~DY and recall it with ^XG. For a 4x6 inch label at 300 DPI with a half-inch square logo, the uncompressed hex data is around 12 KB; Z64 typically reduces this to 4 to 5 KB.
The logo looks pixelated or blurry
Thermal printing is binary: each dot is either printed or not. There is no grayscale. To preserve fine detail and smooth curves in a logo, use the highest DPI your printer supports (300 DPI or 600 DPI for fine-label printers) and apply Floyd-Steinberg dithering during the monochrome conversion step. A vector logo exported to a high-resolution monochrome PNG will always look sharper than a low-resolution raster source.
DPI and dot math: quick reference for logo sizing
Printer DPI
Dots per mm
1-inch logo width (dots)
Bytes per row
Hex chars per row
203
8
203
26
52
300
12
300
38
76
600
24
600
75
150
A 600 DPI printer printing a 1-inch square logo generates 600 x 600 = 360,000 dots = 45,000 bytes = 90,000 hex characters of raw data. At that scale, Z64 compression or printer-stored graphics are not optional; they are necessary.
^GF vs ^XG vs image-in-PDF: which approach fits which workflow?
Approach
Best for
Drawbacks
Inline ^GF (hex)
Small logos, simple integrations, self-contained labels
Large data per label; harder to update logo across a print run
Inline ^GF (Z64)
Medium logos, bandwidth-constrained connections
Requires a compression library to generate
~DY + ^XG
High-volume runs, logos shared across label formats
Printer memory management; must re-download after factory reset
PDF with embedded image
Desktop printing, color labels, non-Zebra printers
Requires a print driver; not raw ZPL; cannot target port 9100 directly
Label Toolkit ZPL export
Any of the above; tool picks the right encoding automatically
Requires designing in the browser (which takes minutes)
Frequently asked questions
What image formats does ZPL's ^GF command accept?
^GF itself only accepts raw pixel data encoded as ASCII hex (A), binary (B), or Z64 compressed (C). It does not accept PNG or JPEG directly. However, Zebra's ~DY command on Link-OS firmware (ZD420, ZD620, and similar modern models) can download a PNG or GRF file to printer memory, which ^XG then recalls.
How do I find the byte count to put in the ^GF parameters?
Calculate bytes per row as ceil(width_in_dots / 8), then multiply by height in dots to get total bytes. For a 100-dot wide, 50-dot tall image: ceil(100/8) = 13 bytes per row; 13 x 50 = 650 total bytes. The hex data string will be 1300 characters long.
Can I use a color logo on a ZPL label?
Standard thermal and thermal-transfer Zebra printers only print black (or the ribbon color). Color logos must be converted to 1-bit monochrome before encoding. Dithering preserves the illusion of gradients, but all dots are still binary. Some specialist color thermal printers exist but they use different command sets outside ZPL's standard scope.
Will my logo stored with ~DY survive a printer power cycle?
It depends on where you store it. Data written to RAM (R: prefix) is lost on power-off. Writing to Flash (E: prefix) or an optional memory card (B:) is persistent across reboots. For production environments, always store logos to Flash using ~DYE:LOGO.
Is there a size limit for logos in ZPL?
Printer RAM and Flash capacity set the practical limits, not ZPL itself. A Zebra ZD420 ships with 256 MB Flash, which is more than enough for any realistic label logo library. The binding constraint in practice is the TCP/IP or serial transfer time for large inline ^GF blocks, which is why Z64 compression and stored graphics exist.
Ready to stop wrestling with hex data and byte counts? Create a free Label Toolkit account and upload your logo directly into the browser-based designer. The ZPL export handles every encoding detail automatically, so you can go from logo file to print-ready ZPL in under two minutes.