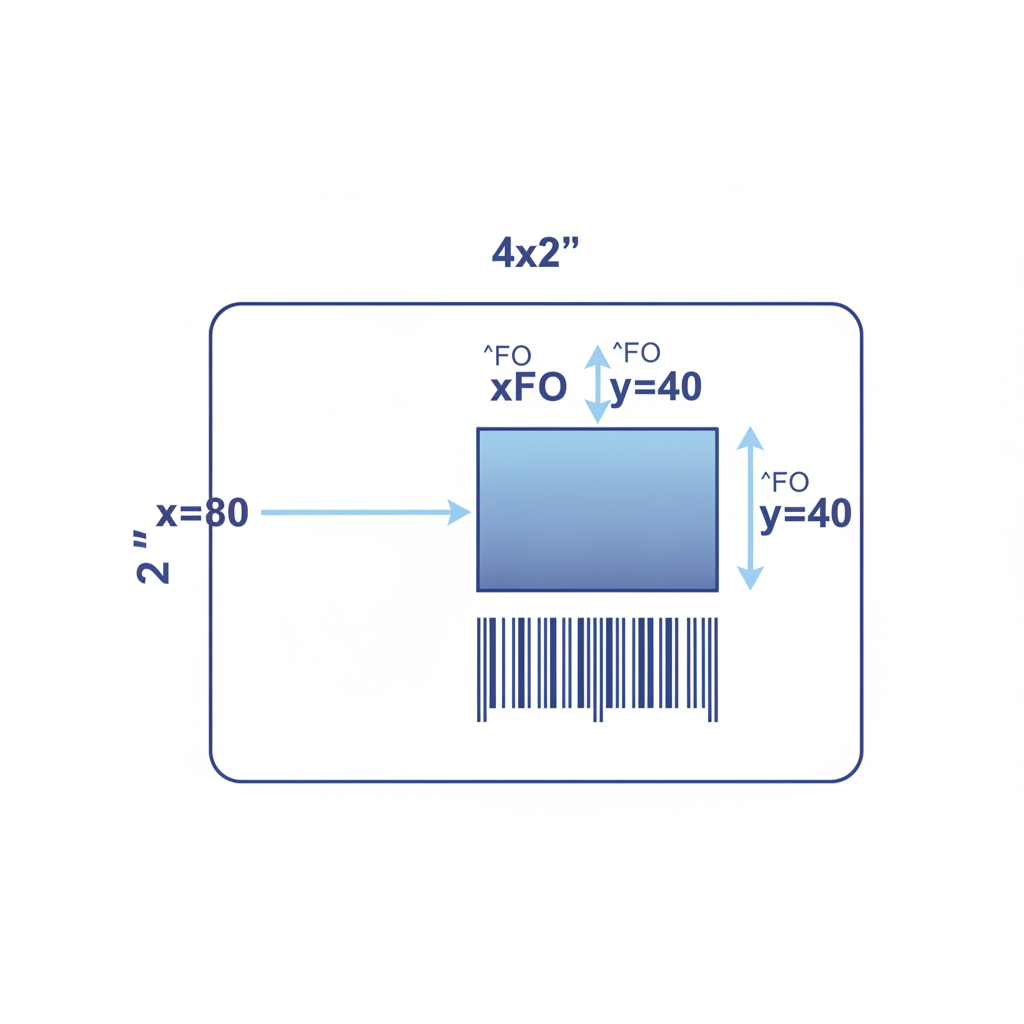
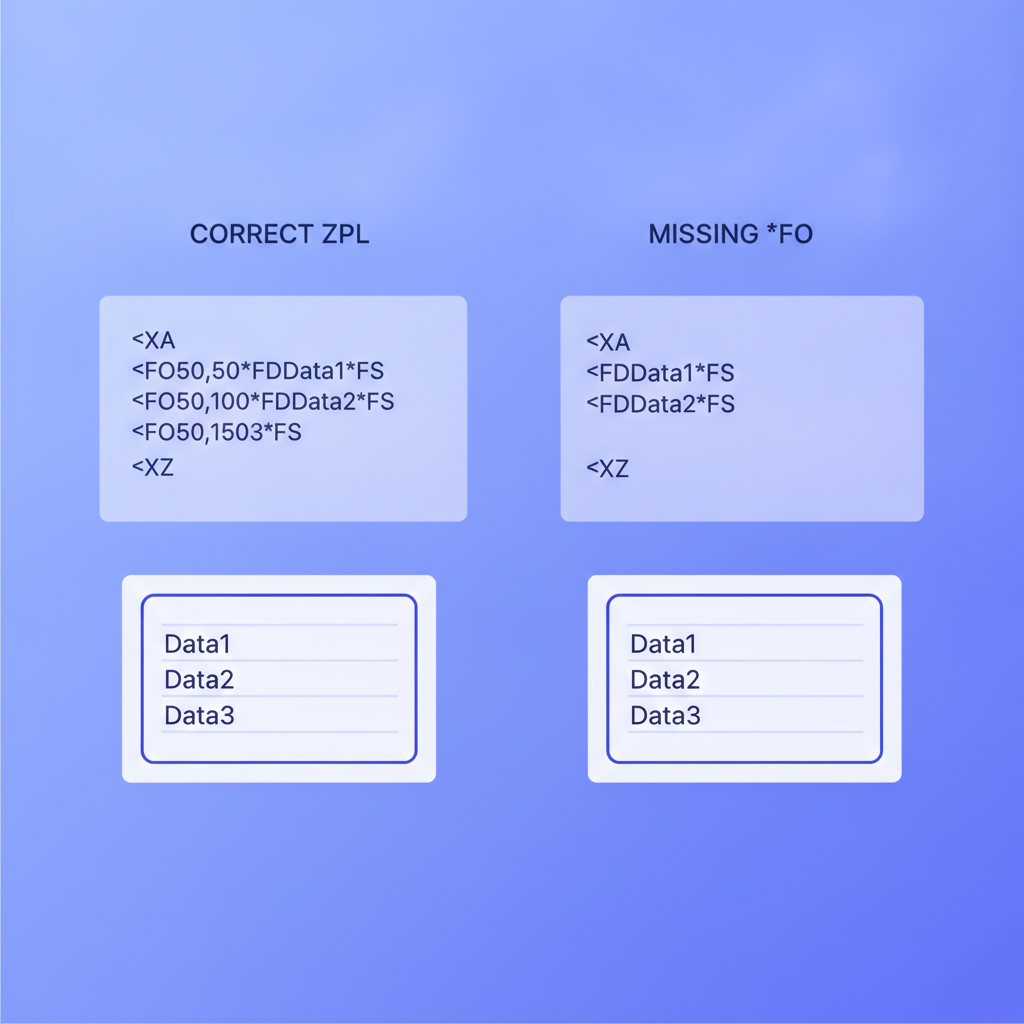
The ^FO command in ZPL (Zebra Programming Language) sets the field origin, meaning the x and y coordinates where the next field's upper-left corner is placed on the label. Every text element, barcode, or graphic you print needs an ^FO to tell the Zebra printer exactly where to start drawing. Label Toolkit generates correct ^FO values automatically when you export ZPL, but understanding the command helps you debug and hand-tune your templates.
^FO takes two required parameters: horizontal offset (x) and vertical offset (y), both measured in dots from the top-left corner of the printable area.
At 203 dpi (dots per inch), one dot equals approximately 0.125 mm (5 mil); at 300 dpi one dot is roughly 0.0847 mm. Always match your printer's resolution when calculating positions.
^FO must appear after ^XA (label start) and before the field-content commands (^FD, ^BC, ^BQ, etc.), and the field is closed with ^FS.
An optional third parameter controls the justification mode (left, right, or auto) and defaults to left-justified when omitted.
What is the ^FO command and why does it matter?
ZPL treats a label as a blank grid of dots. The printer's coordinate origin (0, 0) sits at the top-left corner of the printable area, x increases to the right, and y increases downward. ^FO drops a pin at a specific dot on that grid and tells the printer: start drawing the next field here.
Without ^FO, or with an incorrect one, fields stack at position 0,0 or overlap each other. That is one of the most common reasons a ZPL label looks garbled when rendered in an online viewer or printed on a Zebra ZD420, ZT230, or similar thermal printer.
Syntax: how to write ^FO correctly
^FOx,y[,z]
Parameter
Name
Required?
Range (ZPL II)
Default
x
Horizontal offset (left edge of field)
Yes
0 to 32000 dots
0
y
Vertical offset (top edge of field)
Yes
0 to 32000 dots
0
z
Justification mode
No
0 = left, 1 = right, 2 = auto
0 (left)
The z parameter (justification) is almost always omitted in practice. You would set it to 1 only when you need a field to grow leftward from its anchor point, such as a right-aligned price on a retail shelf label.
How dots map to real-world measurements
Every Zebra printer has a rated print density expressed in dpi (dots per inch) or dpmm (dots per millimeter). The two most common are 203 dpi and 300 dpi.
Print density
Dots per mm (dpmm)
1 dot in mm
1 mm in dots
1 inch in dots
203 dpi
8 dpmm
0.125 mm
8 dots
203 dots
300 dpi
12 dpmm
0.0833 mm
12 dots
300 dots
600 dpi
24 dpmm
0.0417 mm
24 dots
600 dots
So if you want text to start 10 mm from the left edge on a 203 dpi printer, you pass ^FO80,... (10 mm x 8 dpmm = 80 dots). On a 300 dpi printer the same 10 mm becomes ^FO120,.... This is where labels printed on one printer look shifted when sent to a different-resolution device: the dot values stay the same but the physical size changes.
The Zebra ZPL II Programming Guide documents this coordinate system in full, including label rotation effects on the origin.
A minimal working example
Here is a complete ZPL label that places a text field 10 mm from the left and 5 mm from the top on a 203 dpi printer, followed by a Code 128 barcode below it:
^FO80,40: positions the field at x=80 dots (10 mm), y=40 dots (5 mm) from top-left.
^A0N,30,30: selects the scalable font (font 0), orientation Normal, height 30 dots, width 30 dots.
^FDHello, Label Toolkit^FS: writes the text and closes the field.
^FO80,100: moves origin to x=80 dots, y=100 dots (12.5 mm down) for the barcode.
^BCN,60,Y,N,N: opens a Code 128 barcode, Normal orientation, 60 dots tall, with a human-readable interpretation line below.
^FD12345678^FS: the barcode data, field closed.
^XZ: ends the label format and triggers printing.
How label rotation affects ^FO coordinates
The ^LH (Label Home) command shifts the effective origin of the entire label, and the ^PO (Print Orientation) or ^LR (Label Reverse) commands can rotate and mirror the field space. When rotation is set to 180 degrees, the printer remaps x and y so that 0,0 is in what looks like the bottom-right corner. This trips up many developers who hand-edit ZPL.
A safe practice: keep ^LH at its default ^LH0,0 and express all positions relative to the physical top-left of the label. Label Toolkit does this by default when it exports ZPL from your browser-based design, so the output is rotation-safe.
^FO versus ^LH: what is the difference?
^LH (Label Home) sets a global offset that shifts the coordinate origin for the entire label. Think of it as moving the grid itself. ^FO then places each individual field relative to wherever that shifted origin is. In most practical labels ^LH0,0 is the correct and default setting, and you use ^FO alone to position every element.
You might use ^LH to compensate for a consistent physical offset caused by your media supply, such as a 3-dot left margin built into a pre-printed form. You should not use ^LH to position individual fields.
Common mistakes and how to fix them
Field prints at 0,0 or is clipped at the edge
This usually means ^FO is missing before a field, or the x/y values are negative (not valid in standard ZPL II). Add a valid ^FO before every ^FD, ^BC, or ^BQ block.
Positions look correct in the viewer but shift when printed
The printer's DPI does not match what your software assumed. Check the printer's configuration label (hold the feed button during power-on on most Zebra models) and verify the print density, then recalculate your dot values using the table above.
Two fields overlap each other
Each field needs its own ^FO. A missing ^FS at the end of the first field can cause the second field's ^FO to be treated as data rather than a command. Always close every field with ^FS before opening the next ^FO.
Barcode quiet zone is cut off
The quiet zone (the mandatory blank space on either side of a barcode) is part of the barcode's total width. If your ^FO x value is too small, the left quiet zone is clipped by the media edge. The GS1 barcode technical guides specify a minimum quiet zone of 10x (ten times the narrowest bar width) for Code 128 and GS1-128. At 203 dpi with a typical x-dimension of 2 dots, that is a minimum 20-dot (2.5 mm) margin on each side. Leave at least ^FO20,... for barcodes starting near the left edge.
Practical positioning patterns
Centering a field horizontally
ZPL does not have a native center command for ^FO positions. The closest approach is to use the ^FB (Field Block) command, which lets you specify a fixed-width text block with center alignment. For example, to center text in a 400-dot-wide block starting at x=40:
When you design a label in Label Toolkit's browser-based designer and export it as ZPL, the tool calculates every ^FO value from the element's visual position on the canvas, converts from pixels to dots using the target printer's DPI setting you specify, and writes the correct coordinates automatically. You can also paste raw ZPL into the built-in viewer and see how changes to ^FO values affect placement in real time, without sending anything to a printer.
For a broader view of how ^FO fits into the full structure of a ZPL label, the complete guide to ZPL II explains how ^XA, ^FO, ^FD, ^FS, and ^XZ work together as a unit. For the full list of ZPL commands and how each cluster of commands relates to the others, see the ZPL commands reference hub.
Frequently asked questions
What does ^FO do in ZPL?
^FO sets the field origin, which is the x and y dot coordinates of the upper-left corner of the next field on a Zebra label. Every text block, barcode, and graphic needs an ^FO before its content command so the printer knows where to place it.
Are ^FO coordinates in millimeters or dots?
The values are always in dots, not millimeters or inches. To convert, multiply your desired distance in millimeters by the printer's dpmm value: 8 for 203 dpi printers, 12 for 300 dpi printers, and 24 for 600 dpi printers.
Can ^FO accept negative values?
Standard ZPL II does not support negative ^FO values. A negative coordinate would place the field origin off the label surface, and the printer typically ignores or clips it. If you need to adjust the global starting position, use ^LH instead.
What is the difference between ^FO and ^LH?
^LH moves the entire coordinate grid for all fields on the label, acting as a global offset. ^FO positions one specific field relative to that grid. In most labels you keep ^LH0,0 and use only ^FO to control where each element appears.
Do I need ^FO before every field?
Yes. Every field block (anything between an ^FO...^FS pair) needs its own ^FO. Without it, the printer uses the previous field's origin or defaults to 0,0, which causes fields to overlap or print in the wrong location.
Ready to stop writing ZPL by hand? Create a free Label Toolkit account and let the designer generate accurate ^FO coordinates and complete ZPL output directly from your visual label layout.