ZPL II (Zebra Programming Language II) is a text-based printer command language developed by Zebra Technologies that instructs Zebra thermal printers exactly where to place text, barcodes, graphics, and lines on a label. Label Toolkit lets you design, preview, and export ZPL II labels entirely in your browser without installing any software or drivers, making it the fastest way to get started with Zebra label printing.
ZPL II is a plain-text language: every label is a sequence of caret-prefixed commands such as ^XA, ^FO, ^FD, and ^XZ that any Zebra-compatible printer understands natively.
ZPL II replaced the original ZPL around 1991 and is now the de-facto standard for warehouse, shipping, healthcare, and retail label printing worldwide.
You can send a raw ZPL II file directly to a printer over a TCP/IP socket (port 9100), USB, or serial connection, with no intermediate driver required.
Label Toolkit generates valid ZPL II output from its visual designer and also offers a free public ZPL API so developers can produce labels programmatically.
What Does ZPL II Actually Look Like?
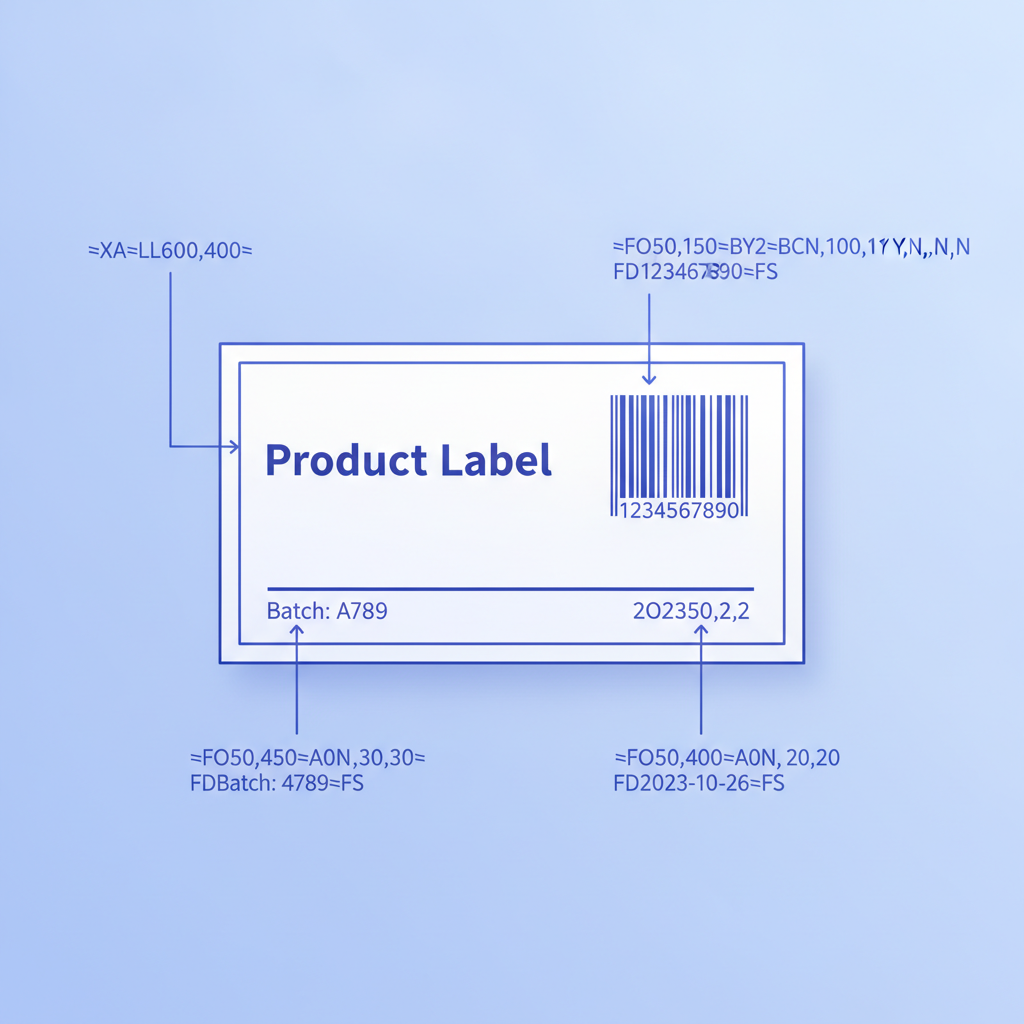
A ZPL II file is plain ASCII text. Every label starts with ^XA (Start Format) and ends with ^XZ (End Format). Everything between those two commands describes one label. Here is a minimal working example that prints a text field and a Code 128 barcode on a 4 x 2 inch (101.6 x 50.8 mm) label at 203 dpi (8 dots per mm):
^XA
^PW812
^LL406
^FO50,40^A0N,36,36^FDShip To: Warehouse B^FS
^FO50,100^BY3^BCN,80,Y,N,N^FD1234567890^FS
^XZ
Break that down line by line and it reads like a recipe. ^PW812 sets the print width to 812 dots (4 inches at 203 dpi). ^LL406 sets the label length to 406 dots (2 inches). ^FO50,40 positions the field origin at x=50, y=40 dots from the top-left corner. ^A0N,36,36 selects built-in font 0 at 36x36 dots. ^FD carries the field data, and ^FS closes the field. The barcode line uses ^BY3 to set the bar width to 3 dots, then ^BCN,80,Y,N,N to draw a Code 128 barcode 80 dots tall with a human-readable check digit below it.
A Short History: ZPL vs ZPL II
Zebra Technologies introduced the original ZPL in the mid-1980s as a proprietary alternative to Eltron Programming Language (EPL). ZPL II arrived around 1991 and added scalable fonts, enhanced graphics, XML support, and the field-level architecture (the ^FO/^FD/^FS triplet) that developers still use today. Almost every Zebra printer sold after 1995 supports ZPL II natively, and Zebra's own documentation treats the two names as interchangeable in most contexts. When someone says "ZPL" in a warehouse or DevOps context, they almost always mean ZPL II.
EPL (Eltron Programming Language) is a separate, older language used on some legacy Zebra LP/TLP series printers. EPL uses different syntax, and the two are not compatible. If your printer's model number starts with ZD, ZT, ZC, GX, GK, or ZQ, it speaks ZPL II.
How ZPL II Communicates with a Printer
Zebra printers expose several raw data ports. The most common production method is a TCP/IP raw socket on port 9100. Send the ZPL II text string to that address and port, and the printer processes it immediately, no driver, no spool, no PDF conversion needed. Other supported channels include:
USB (RAW / ZPL mode): present the device as a standard USB printer; write bytes directly to it from any language that can open a file handle.
Serial (RS-232): common in older fixed installations; baud rate typically 9600 or 115200.
Bluetooth SPP: used on mobile Zebra ZQ-series printers for handheld workflows.
Zebra Print DNA / Link-OS SDK: Zebra's proprietary SDK wraps the raw ZPL II socket in a higher-level API for enterprise deployments.
For browser-based or cloud workflows, Label Toolkit's free public ZPL API renders ZPL II to a PNG or PDF preview in milliseconds, which you can then forward to a network printer via your backend.
The Anatomy of a ZPL II Command
Every ZPL II command follows one of two prefix conventions:
Prefix
Meaning
Example
Purpose
^ (caret)
Label-format command
^FO50,30
Defines layout, fields, barcodes, fonts
~ (tilde)
Control / immediate command
~HI
Printer status, reboot, calibration, host queries
Caret commands are by far the more common of the two. Parameters follow the command mnemonic immediately, separated by commas, with no spaces. Optional parameters can be omitted by leaving a blank between commas (for example, ^BCN,80,,N,N skips the third parameter to use its default value).
The Core ZPL II Commands Every Developer Must Know
The full ZPL II command set runs to several hundred entries. The following table covers the 15 commands that appear in the vast majority of real-world labels. For an exhaustive per-command reference with live examples, see the ZPL Commands complete category hub.
Command
Name
Key Parameters
What It Does
^XA
Start Format
none
Opens a new label; always the first line
^XZ
End Format
none
Closes and sends the label to the print buffer
^PW
Print Width
width in dots
Sets the usable print width (e.g., 812 for 4 in at 203 dpi)
^LL
Label Length
length in dots
Sets label height; important for die-cut media
^FO
Field Origin
x, y (dots from top-left)
Positions the next field element on the label
^FD
Field Data
data string
Supplies the text or barcode value for the current field
^FS
Field Separator
none
Closes the current field; always paired with ^FD
^A
Font
font name, height, width
Selects a built-in or downloaded scalable font
^CF
Change Alphanumeric Default Font
font name, height, width
Sets the default font for all subsequent text fields
^BY
Bar Code Field Default
module width, ratio, height
Sets default bar width and height for 1D barcodes
^BC
Code 128 Bar Code
orientation, height, print interp, check digit
Draws a Code 128 barcode (the most common 1D symbology)
^BQ
QR Code Bar Code
model, magnification, error correction
Draws a QR code; magnification 1-10 controls size
^GB
Graphic Box
width, height, thickness, color
Draws rectangles, lines, and borders
^GF
Graphic Field
format, data bytes, total bytes, row bytes, data
Embeds a bitmap graphic (logo, icon)
^PQ
Print Quantity
quantity, pause count, replicate, cut
Prints the label N times before stopping
Understanding Dots, DPI, and Physical Measurements in ZPL II
ZPL II always works in dots, never millimetres or inches directly. The conversion depends on your printer's resolution, which is measured in dots per inch (dpi) or dots per mm (dpmm). The most common resolutions are:
Resolution
Dots per inch
Dots per mm
1 mm equals
Common printer models
Standard
203 dpi
8 dpmm
8 dots
ZD421, ZD620, GX420d
High
300 dpi
12 dpmm
12 dots
ZD421 (300 variant), ZT411
Ultra-high
600 dpi
24 dpmm
24 dots
ZT610-600, ZD621-600
So a ^FO100,200 command on a 203 dpi printer places the field at approximately 12.7 mm (0.5 in) from the left edge and 25.4 mm (1 in) from the top. On a 300 dpi printer, the same command lands at 8.5 mm x 16.9 mm. This matters enormously when you port a label template between printers of different resolutions. Always verify ^PW and ^LL values when switching hardware.
Zebra's official ZPL II Programming Guide (available from Zebra Technologies) covers every command parameter table and resolution chart in full detail.
How to Write a ZPL II Label Step by Step
Determine label dimensions. Measure the physical label stock in millimetres or inches, then multiply by the printer dpi to get dots. A 101.6 x 152.4 mm (4 x 6 in) shipping label on a 203 dpi printer is 812 x 1218 dots.
Open the format. Write ^XA on its own line.
Set print width and label length. Add ^PW812 and ^LL1218 (using the dot values from step 1).
Set a default font (optional but recommended).^CF0,30,30 sets built-in font 0 at 30x30 dots for all text fields that do not specify their own font.
Add text fields. Use the ^FO, ^A (or rely on the ^CF default), ^FD, ^FS sequence for each text element. Example: ^FO40,50^FDOrder #: 9981234^FS
Add a barcode. Set bar width with ^BY, then call the relevant barcode command. For Code 128: ^FO40,120^BY2^BCN,100,Y,N,N^FD9981234^FS
Add any graphic boxes or lines.^FO40,240^GB730,3,3^FS draws a full-width 3-dot horizontal rule.
Set print quantity.^PQ1 prints one copy. Use ^PQ10 for ten copies.
Close the format. Write ^XZ as the final line.
Barcode Commands in ZPL II: 1D and 2D
ZPL II supports dozens of barcode symbologies natively. The commands share a consistent structure: set defaults with ^BY, then invoke the symbology command, then supply data with ^FD/^FS. Here are the most commonly used symbologies and their commands:
Symbology
ZPL II Command
Typical Use Case
Example
Code 128
^BC
Shipping, logistics, GS1-128
^BCN,80,Y,N,N
Code 39
^B3
Auto-industry, defense
^B3N,N,60,Y,N
QR Code
^BQ
URLs, product lookup, NFC alternative
^BQN,2,5,Q,7^FDQA,https://example.com^FS
Data Matrix
^BX
Healthcare, small parts, GS1
^BXN,5,200
UPC-A
^BU
North American retail POS
^BUN,80,Y,N,N
EAN-13
^BE
International retail POS
^BEN,80,Y
PDF417
^B7
Government IDs, transport
^B7N,10,7,3,4,N
ITF-14
^BI
Outer carton / GTIN-14
^BIN,80,Y
Quiet zones (the blank space surrounding a barcode that scanners require to identify the start and end of the symbol) are your responsibility in ZPL II. The standard minimum quiet zone for Code 128 is 10x the narrow bar width, and for QR Code it is 4 modules (4 cells) on all sides, per the ISO/IEC 18004:2015 QR Code specification. Always leave at least 3 mm of unprinted margin around any barcode when setting your ^FO coordinates.
ZPL II vs EPL vs CPCL: Which Language Does Your Printer Use?
Language
Developer
Typical Hardware
Syntax Style
Current Status
ZPL II
Zebra Technologies
ZD, ZT, ZC, GX, GK series
Caret/tilde commands
Active, widely supported
EPL2
Eltron (acquired by Zebra)
LP 2824, TLP 2844 (legacy)
Letter-prefix lines (N, A, B, P)
Legacy; not on new hardware
CPCL
Comtec / Zebra
QL, ZQ mobile series
Plain-text line-based
Active on mobile printers
TSPL
TSC Auto ID
TSC, Godex, some Honeywell
BASIC-like statements
Active on non-Zebra hardware
If you are unsure which language your printer accepts, send the tilde query command ~HI over your TCP socket. The printer responds with a host identification string that includes the firmware version and supported language set.
Common ZPL II Mistakes and How to Avoid Them
New ZPL II developers run into the same problems repeatedly. Here is what actually goes wrong in practice and how to fix each one:
Missing ^XA or ^XZ: The label never enters the print queue. Always wrap every label in the pair, even single-field test labels.
Wrong dots-per-inch conversion: A ^PW value calculated for 203 dpi sent to a 300 dpi printer produces a label that uses only about two-thirds of the physical width. Check the printer configuration label (hold the feed button at power-on) to confirm resolution before writing coordinates.
Overlapping fields:^FO coordinates are absolute from the top-left corner. Two fields that share coordinates will overlap silently; ZPL II does not warn you. Use a visual previewer such as Label Toolkit's designer to catch this before committing to a print run.
Barcode data with illegal characters: Code 128 auto-selects sub-sets A, B, and C. Passing characters outside the ASCII 32-126 range without escaping them produces a blank or corrupted barcode. Validate your data string before embedding it.
Forgetting ^FS: Without the field separator, the printer holds the field open and subsequent commands are treated as field data rather than layout commands. The result is a garbled or empty label.
Printing to a paused printer: Use the tilde command ~PP (Pause and Resume) or the host status commands to confirm the printer is ready before sending a job.
Testing and Previewing ZPL II Without a Physical Printer
You do not need a Zebra printer connected to test ZPL II code. Several approaches let you validate a label before you commit to physical media:
Label Toolkit designer: Paste or export ZPL II and see the rendered label in your browser. The Label Toolkit documentation walks through the designer's ZPL preview and export features step by step.
Label Toolkit ZPL API: POST a ZPL II string to the free public ZPL API endpoint and receive a PNG render back. Ideal for automated CI checks of label templates.
Zebra's own ZPL viewer: Zebra provides a browser-based tool at labelary.com (commonly called Labelary) that renders ZPL II to PNG. It is useful for quick one-off checks but has no design or export features.
ZPL II in Production Workflows
Most real warehouse and e-commerce deployments do not hand-write ZPL II. Instead, a server-side process generates ZPL II strings dynamically, populating ^FD values from a database or order management system, then pushing the resulting text to a network printer. Common patterns include:
Templated strings in Python or Node.js: Store the static ZPL II skeleton with placeholder tokens, then substitute order data at runtime using string formatting or a template engine.
REST API integration: Call a label generation API (such as Label Toolkit's) to convert structured JSON order data into print-ready ZPL II, then forward the response body directly to the printer socket.
CSV data merge: Upload a spreadsheet of items and quantities to Label Toolkit's data merge tool; the tool generates one ZPL II label per row with barcodes and variable text pre-populated.
WMS and ERP plugins: Enterprise warehouse management systems such as SAP EWM and Oracle WMS have built-in ZPL II rendering engines that consume label templates defined in a proprietary UI and emit ZPL II to floor printers.
For a deep-dive into all ZPL commands used in production templates, the ZPL Commands complete category hub covers every major command with annotated examples and parameter tables.
Frequently asked questions
What is the difference between ZPL and ZPL II?
ZPL (Zebra Programming Language) was the original 1980s version. ZPL II is its successor, introduced around 1991, with scalable fonts, enhanced graphics primitives, and the field-based architecture (^FO/^FD/^FS) that modern labels rely on. In everyday use the two names are treated as synonymous because virtually all current Zebra printers only support ZPL II.
Can I use ZPL II without a Zebra printer?
Yes. Several non-Zebra printers from manufacturers like Honeywell, SATO, and Cab support ZPL II emulation mode. You can also preview and export ZPL II entirely in your browser using Label Toolkit without owning any printer at all, which is handy for template development and testing.
How do I find the correct DPI for my Zebra printer?
Hold the Feed button while powering on the printer to print a configuration label. The label shows the print resolution (203, 300, or 600 dpi) in the hardware configuration section. You can also send the ZPL II query command ~HI over a TCP/IP socket and read the response string, which includes the dots-per-mm value.
What port does a Zebra printer listen on for ZPL II?
Zebra network printers accept raw ZPL II data on TCP port 9100 by default. Open a raw socket connection to the printer's IP address on port 9100, write the ZPL II text, and the printer processes it immediately. No print driver or spooler is needed.
Is ZPL II case-sensitive?
The command mnemonics themselves (such as ^XA, ^FO, ^BC) are case-insensitive; both ^xa and ^XA are valid. However, the data you pass inside ^FD is case-sensitive and prints exactly as supplied, which matters for barcodes that encode alphabetic characters.
Ready to put ZPL II into practice without any setup? Create a free Label Toolkit account and start designing, previewing, and exporting ZPL II labels in your browser right now.