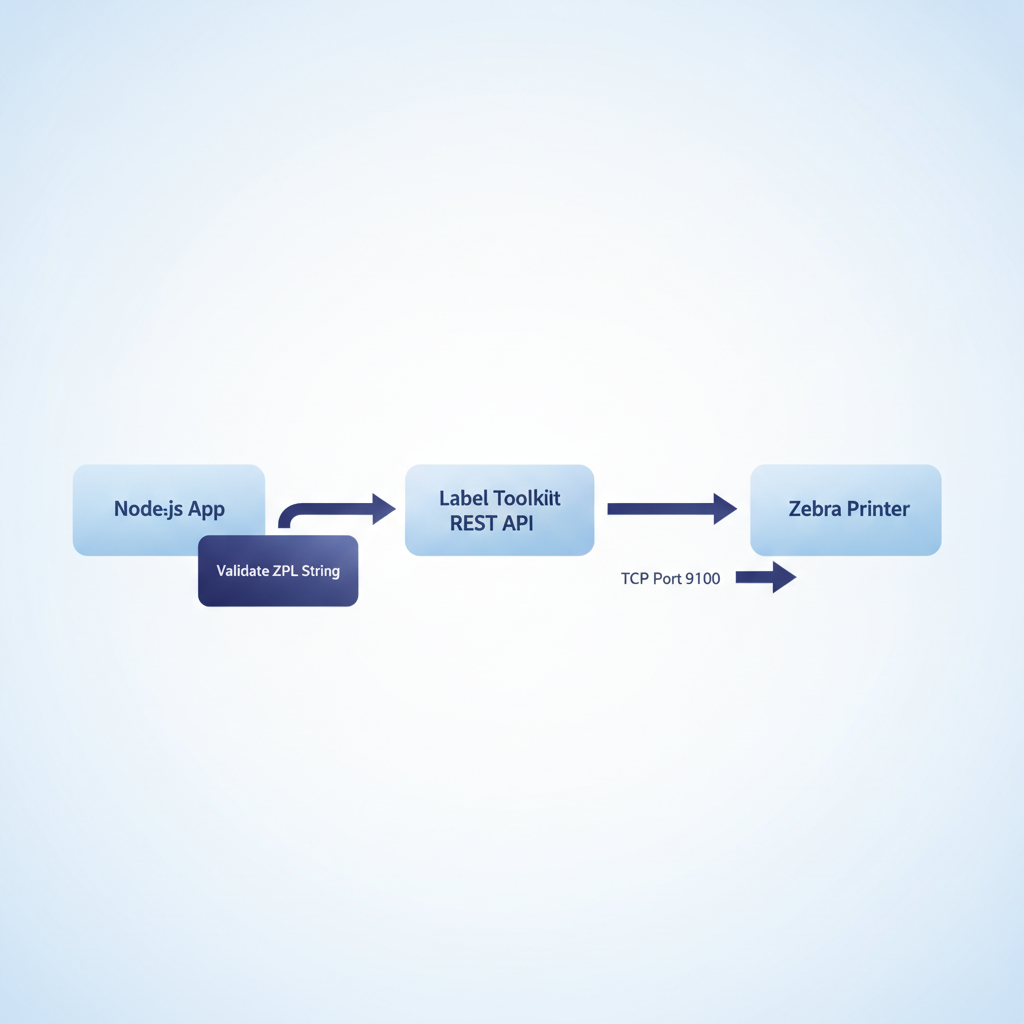
A node label api integration lets your Node.js backend call the Label Toolkit REST API to generate production-ready ZPL strings, which you can spool directly to a Zebra printer over TCP port 9100 or forward to a print queue, all without running a local design tool. Label Toolkit provides a free, no-install endpoint that accepts JSON and returns ZPL II, the native language understood by every Zebra thermal printer built after 1990.
- Label Toolkit exposes a public REST endpoint that accepts a label template ID plus variable field values and returns a ZPL string ready to send to any Zebra printer.
- The Node.js
httpsorfetchmodule (Node 18+) is sufficient; no SDK is required, though the samples below show both approaches. - A single API call can generate one label or a batch of hundreds by passing an array of data rows.
- ZPL output from the API can be forwarded to a Zebra printer over a raw TCP socket on port 9100 or written to a file for offline use.
What the Label Toolkit API returns
Before writing code, it helps to understand what you are actually receiving. The API response contains a ZPL II string, a text-based page description language specific to Zebra printers. A minimal label might look like this:
^XA
^FO50,50^A0N,30,30^FDOrder #1042^FS
^FO50,100^BCN,80,Y,N,N^FD123456789012^FS
^XZ
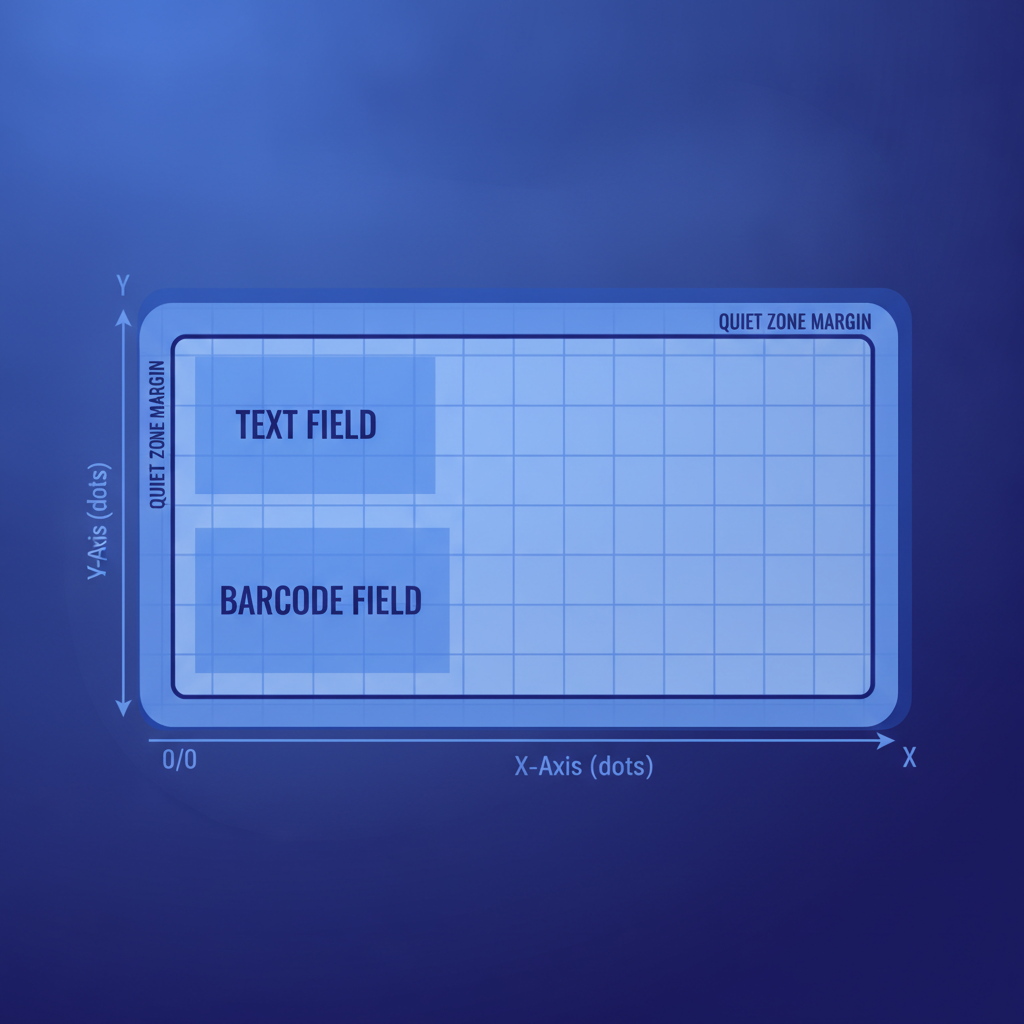
Breaking that down: ^XA opens the label format; ^FO50,50 sets the field origin to x=50 dots, y=50 dots from the top-left corner; ^A0N,30,30 selects the scalable font at 30 by 30 dots; ^FD carries the field data; ^FS closes the field; ^BCN,80,Y,N,N renders a Code 128 barcode 80 dots tall with a human-readable interpretation line below; and ^XZ ends the format and triggers the print. Each of those commands is covered individually in the ZPL commands complete Zebra printing reference if you need to customize the output further.
At 203 DPI (dots per inch), the standard resolution for entry-level Zebra printers such as the ZD420, one dot equals approximately 0.125 mm. At 300 DPI, one dot equals roughly 0.085 mm. That matters when you are converting field origin coordinates from millimeters: multiply mm by 8 for 203 DPI, or by 11.8 for 300 DPI.
Prerequisites
You need three things before writing a single line of Node.js:
- A Label Toolkit account and API key. Create a free account at /register, open any saved label, and copy the template ID from the label settings panel. Your API key lives in your account settings.
- Node.js 18 or later. Version 18 introduced native
fetch, which keeps these samples dependency-free. If you are on Node 16, swapfetchfor thenode-fetchnpm package or the built-inhttpsmodule. - A Zebra printer on your network (optional for testing). If you do not have a printer available yet, paste the returned ZPL string into the online ZPL viewer at /designer.html to preview the rendered label instantly in your browser.
Quick start: generate a single ZPL label
The following sample uses the native fetch API (Node 18+) to request a ZPL label string from Label Toolkit. Replace YOUR_API_KEY and YOUR_TEMPLATE_ID with real values from your account.
// generate-label.mjs
import { writeFileSync } from 'fs';

const API_KEY = 'YOUR_API_KEY';
const TEMPLATE_ID = 'YOUR_TEMPLATE_ID';
const BASE_URL = 'https://labeltoolkit.com/api/v1';

async function generateLabel(fields) {
  const response = await fetch(`${BASE_URL}/labels/${TEMPLATE_ID}/zpl`, {
    method: 'POST',
    headers: {
      'Content-Type': 'application/json',
      'Authorization': `Bearer ${API_KEY}`,
    },
    body: JSON.stringify({ fields }),
  });

  if (!response.ok) {
    const error = await response.json();
    throw new Error(`API error ${response.status}: ${error.message}`);
  }

  const { zpl } = await response.json();
  return zpl;
}

// Example: a shipping label with a Code 128 barcode
const zpl = await generateLabel({
  recipient_name: 'Jane Smith',
  address_line1: '742 Evergreen Terrace',
  city: 'Springfield',
  tracking_number: '1Z9999AA0123456784',
});

console.log(zpl);
// Optionally write to file for offline testing
writeFileSync('label.zpl', zpl, 'utf8');
Run it with node generate-label.mjs. The console output is a valid ZPL string you can send straight to a printer.
Send the ZPL directly to a Zebra printer over TCP
Zebra printers with an Ethernet or Wi-Fi interface listen on TCP port 9100 by default. The net module in Node.js lets you open a raw socket and stream ZPL directly, with no print driver required. This is the approach used in warehouse automation systems, where label printing latency needs to be under 200 ms.
// print-to-zebra.mjs
import net from 'net';

function printZpl(zplString, printerIp, printerPort = 9100) {
  return new Promise((resolve, reject) => {
    const socket = new net.Socket();

    socket.connect(printerPort, printerIp, () => {
      socket.write(zplString, 'utf8', () => {
        socket.end();
      });
    });

    socket.on('close', resolve);
    socket.on('error', reject);

    // Timeout after 5 seconds if printer is unreachable
    socket.setTimeout(5000, () => {
      socket.destroy();
      reject(new Error('Printer connection timed out'));
    });
  });
}

// Usage with the label generated above
await printZpl(zpl, '192.168.1.105');
console.log('Label sent to printer.');
If the printer is at a different IP, change 192.168.1.105 to the address shown on the printer's network configuration printout (press and hold the feed button for two seconds on most Zebra models to print a config page).
Bulk label generation from an array of records
Shipping and warehouse workflows almost always need more than one label at a time. The API accepts a records array, and you can also loop on the client side. Both patterns work; looping on the client side is preferable when each record needs independent error handling, while a server-side batch call reduces round trips for simpler use cases.
Client-side loop with concurrency control
// bulk-labels.mjs
import { writeFileSync } from 'fs';

const orders = [
  { recipient_name: 'Alice Chen', tracking_number: 'TRACK001', city: 'Austin' },
  { recipient_name: 'Bob Patel', tracking_number: 'TRACK002', city: 'Denver' },
  { recipient_name: 'Carol Liu',  tracking_number: 'TRACK003', city: 'Miami'  },
];

// Run up to 5 requests in parallel to stay within API rate limits
async function chunkGenerate(records, concurrency = 5) {
  const results = [];
  for (let i = 0; i < records.length; i += concurrency) {
    const slice = records.slice(i, i + concurrency);
    const batch = await Promise.all(slice.map(fields => generateLabel(fields)));
    results.push(...batch);
  }
  return results;
}

const labels = await chunkGenerate(orders);
// Concatenate all ZPL strings; a Zebra printer prints them in sequence
const combinedZpl = labels.join('\n');
writeFileSync('bulk-labels.zpl', combinedZpl, 'utf8');
console.log(`Generated ${labels.length} labels.`);
When you concatenate ZPL strings, each label begins with ^XA and ends with ^XZ, so the printer treats them as separate jobs and advances media between them automatically. For detailed guidance on label API quickstart and REST authentication patterns, see the full API reference article.
Adding barcodes and QR codes via field values
Label Toolkit templates support barcode fields, so you do not need to hand-write ^BC or ^BQ ZPL commands in your Node.js code. You define the barcode type once in the visual designer, then supply only the data string at request time.
| Barcode type | ZPL command | Typical data length | Common use case |
|---|---|---|---|
| Code 128 | ^BCN,80,Y,N,N | Variable (1 to 48 chars) | Shipping, internal tracking |
| QR Code | ^BQN,2,4 | Up to ~2953 bytes (binary) | URLs, serialized product data |
| GS1-128 | ^BCN,80,Y,N,N with ^FD>8 prefix | Variable with GS1 AIs | Retail, pharma compliance |
| ITF-14 | ^B2N,80,Y | 14 digits exactly | Outer carton / GTIN-14 |
| Data Matrix | ^BXN,3,200 | Up to 2335 alphanumeric chars | PCB, pharma, tiny labels |
If you need to modify barcode parameters directly in the ZPL output, the ^BCN,80,Y,N,N command breaks down as: orientation N (normal), bar code height 80 dots, print interpretation line Y (yes), print interpretation line above N (no), check digit N (auto-calculated). The Zebra ZPL II Programming Guide (available from Zebra's official documentation portal) documents every parameter for every barcode command.